Stretch Sensor | Human Breadboard

This is a swatch created for the Human Breadboard Project and Kit of Process created at eTextile Summer Camp 2015.
I discovered this prototype near the serger on Day 2 of eTextile Summer Camp that I believe was from the Wearables group. I got excited about it and decided to make one myself. I switched out the more resistive yarn for some conductive and boom – beautiful sensor. In a future iteration, I want to try placing the yarn on both sides to compare.
MATERIALS
Resistive stretchy fabric (Eeontex)
Conductive yarn (Silverspun yarn by lessEMF)
Stretchy conductive fabric (Shieldex Technik-tex by Statex or Stretch conductive from lessEMF)
Heat’N’Bond
Conductive Thread (from Adafruit, but there are many, many others)
Lightweight woven cotton
10k resistor
TOOLS
Scissors
Iron
Sewing machine
Needle nose pliers
HOW IT WORKS
Eeontex is a piezoresistive fabric made by a company called Eeontyx. When you stretch the Eeontex, the resistance decreases. This means that more electrical current can pass through the material than when it is in a resting position. Resistance decreases when stretched and when pressure is applied, making it perfect for crafting sensors. Here is a slightly technical, but the intro has a good overview of what is happening beneath the surface.
Eeontyx has a system of coating fabrics in a conductive polymer that does not effect most characteristics of the substrate. For more information on resistive and piezoresistive fabrics, see Kobakant’s post here and the datasheet here.
The Eeontex should be in between two conductive materials. The surface area and structure of the conductive material in relation to the Eeontex will determine the resistance. This applies to any resistive material you are using to construct a sensor. If you are using with a microcontroller, you should also add a 10K pull up resistor to stabilize.
MAKING IT
Note: This is for a test swatch. You will have to adapt it to fit your desired use.
1) Cut a piece of Eeontex to your desired length.
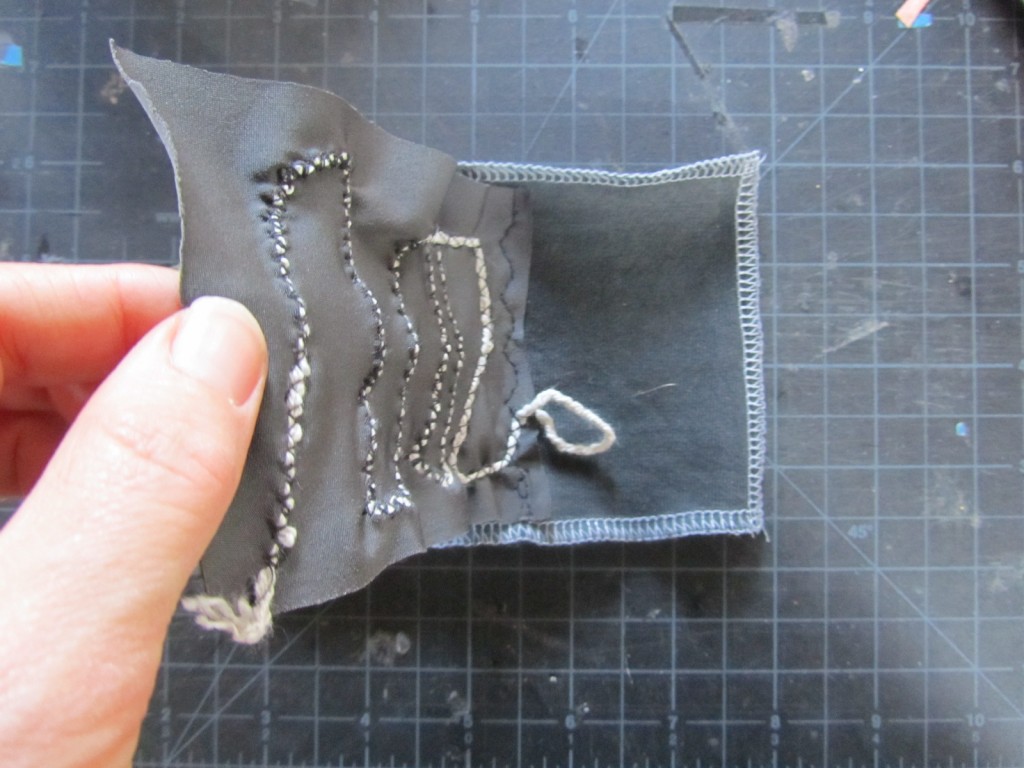
2) Place the yarn in a circular zig-zag across the fabric and pin down. This is just one possible way to situate the yarn – play around with different designs and test them!
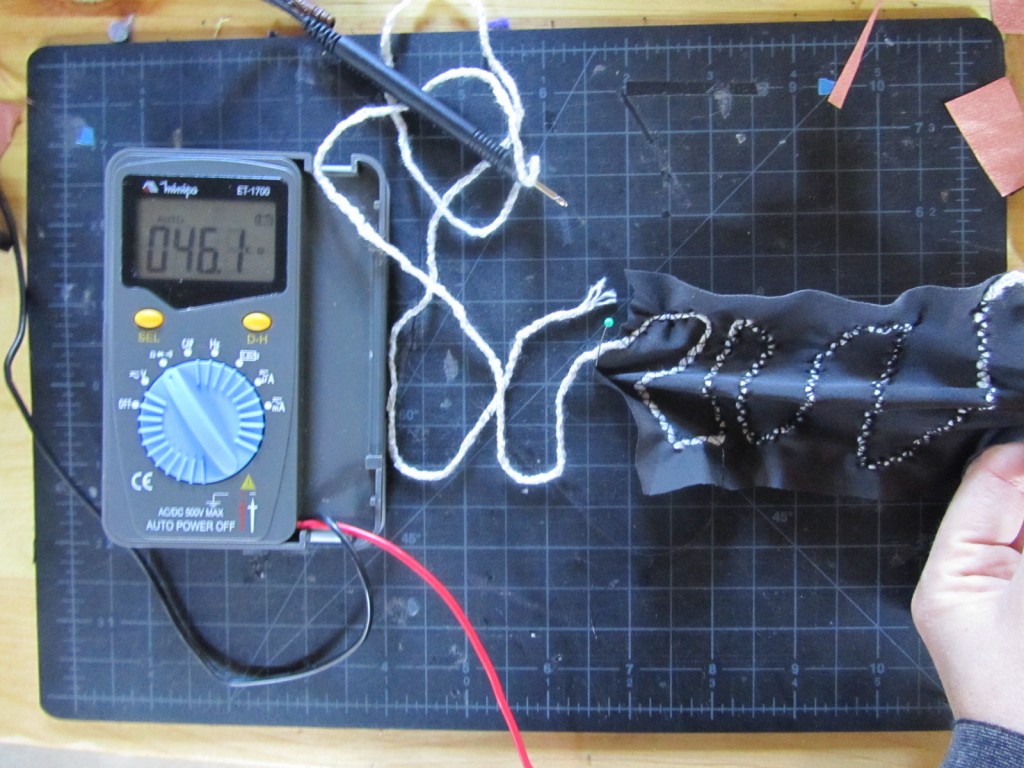
3) Using a zig-zag stitch, sew over the yarn to adhere it to the fabric. Be sure to leave about 3 inches on either end.
4) Test it! Make sure you have constructed it properly and you have a range in resistance when you measure it.
5) Sew one end of the Eeontex to your sample swatch or other base. Be sure to let some of the yarn get through.
6) Using the Heat’n’Bond, iron on three small patches of conductive fabric.
7) Use the conductive thread to sew from the Eeontex to the bottom patch.
8) Use the conductive thread again to make a secure connection to the top patch.
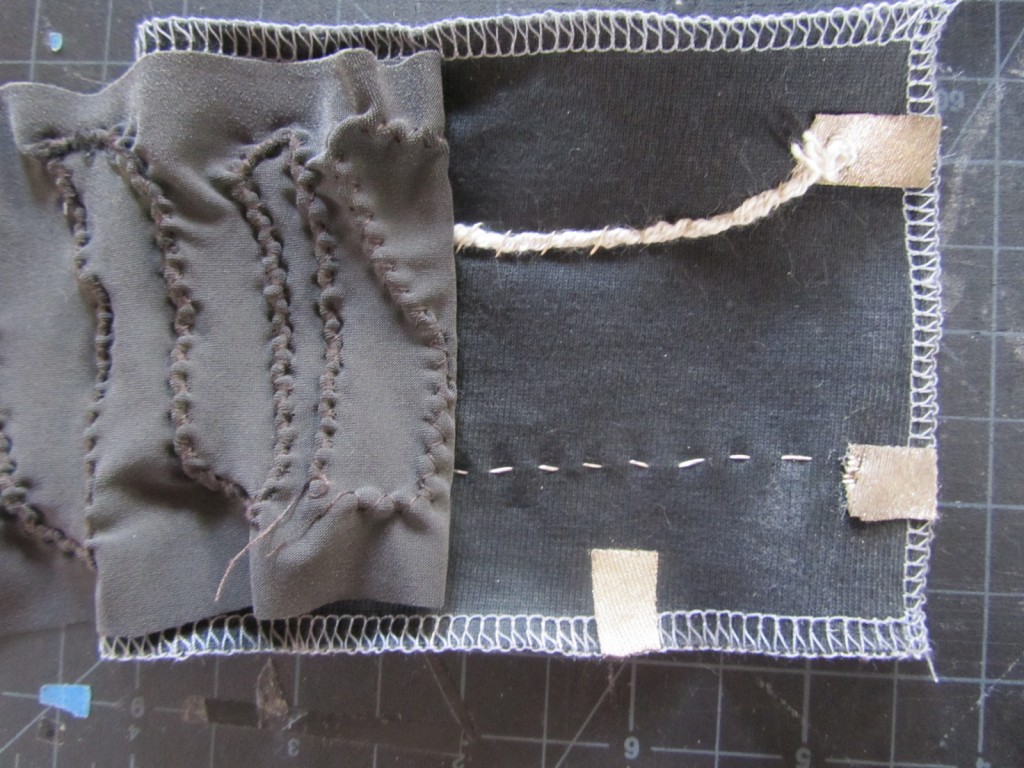
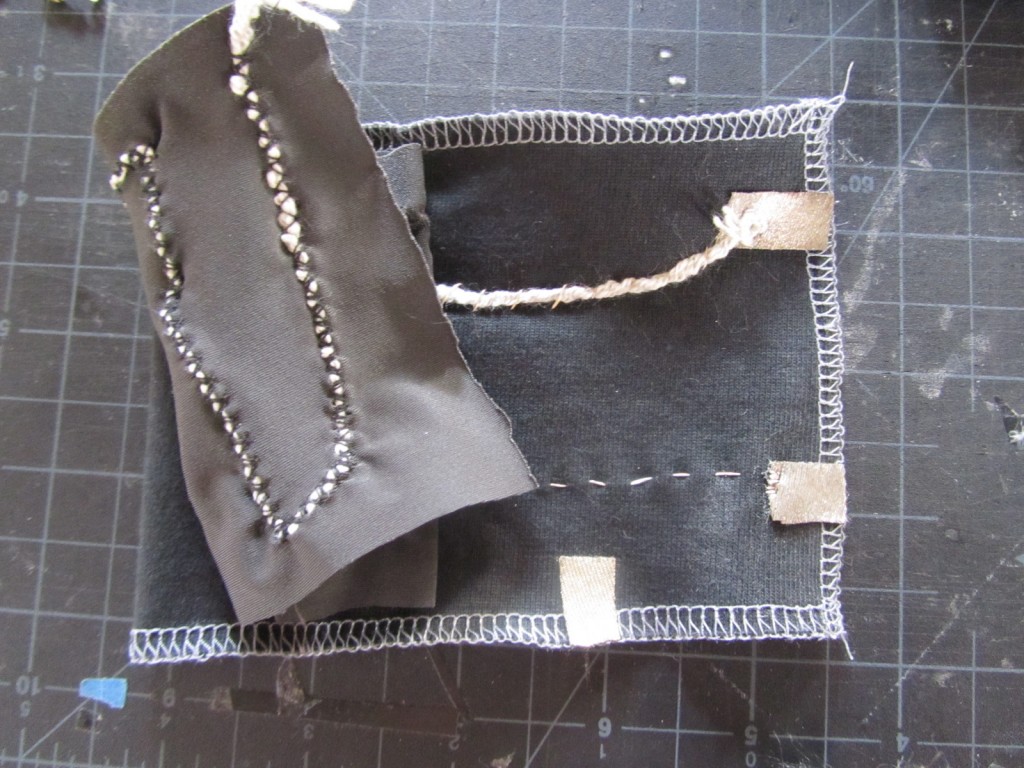
9) Grab some small pliers and wind the two ends of your 10K resistor to make it sewable.Using conductive thread, sew one side of the resistor to the patch and the other side to the conductive thread connecting the Eeontex.
NOTE: Make sure you have a strong connection on both sides and make sure the sides of the resistor are not connected to each other with the thread.
10) Now you’re ready to test it or sew it on! If you are creating the human breadboard, attach a female snap to each patch so it attached to the fabric wires.